Black slime around a faucet aerator or drain looks alarming, and homeowners usually assume the worst about their water quality. Sometimes that’s fair. Sometimes it has nothing to do with your well at all. Getting this distinction right saves you from buying equipment that won’t fix the actual problem.
In this guide
Black Slime Isn’t Always the Same Thing
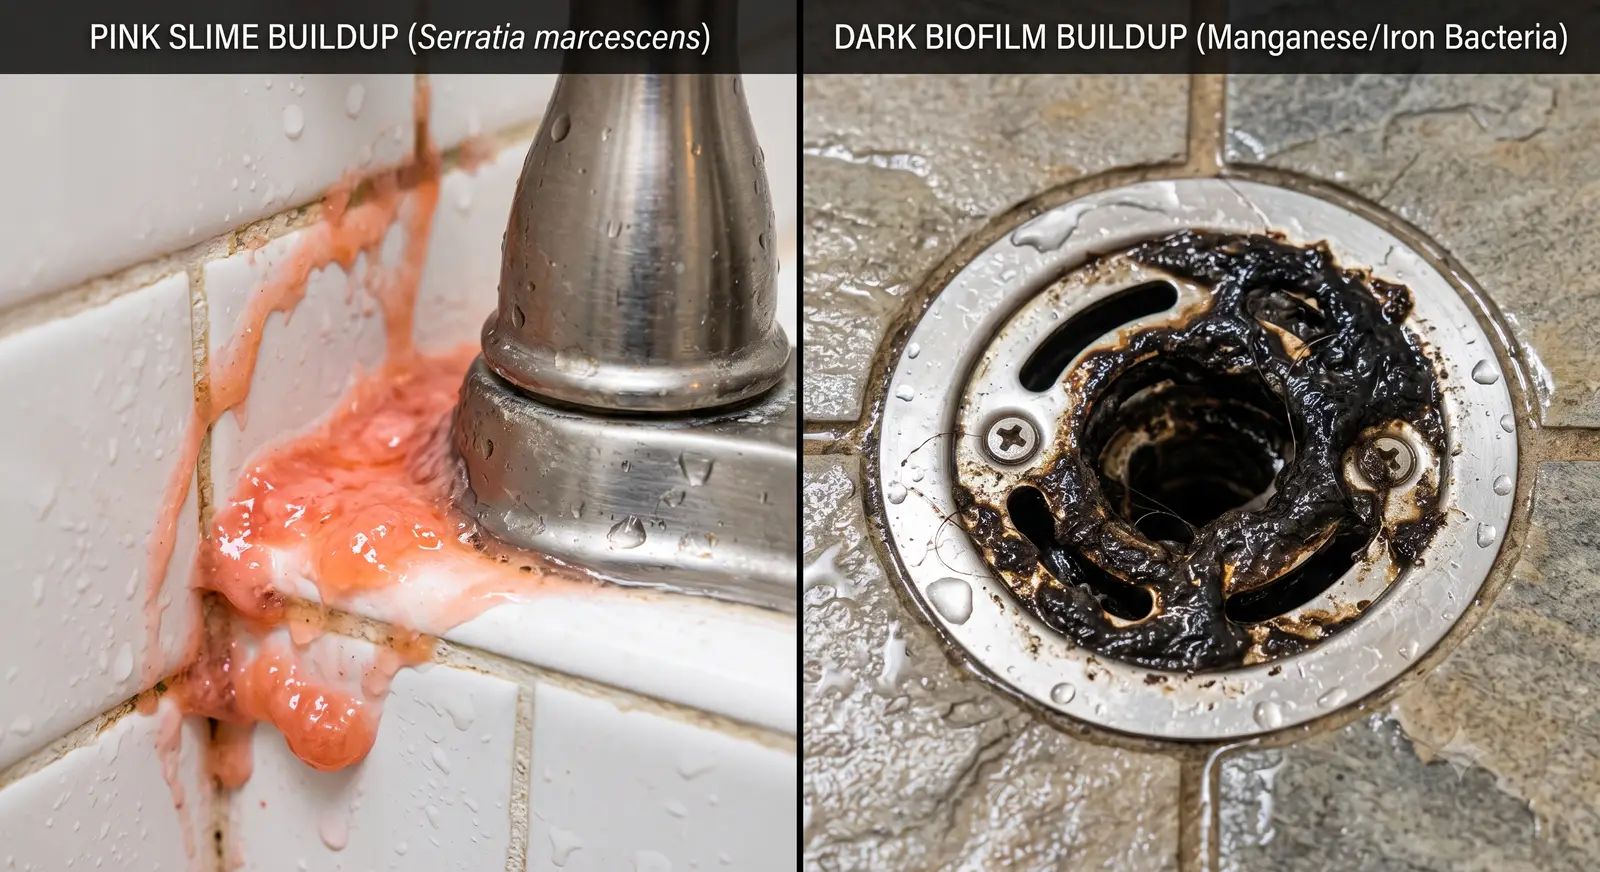
There’s an important distinction here that a lot of well water content online glosses over. Pink or reddish slime in a toilet bowl or shower is usually Serratia marcescens, an airborne bacteria that thrives on moisture and soap residue. It has nothing to do with your water supply and shows up on city water just as often as well water. Black or dark brown-black slime, specifically around faucet aerators, showerheads, or inside toilet tanks fed directly by your well line, is a different story: that’s typically manganese-oxidizing bacteria or iron bacteria biofilm, and it does point to your water.
What’s Actually Causing the Black Slime
Manganese and iron-oxidizing bacteria feed on dissolved manganese and iron naturally present in a lot of well water. They form a slimy biofilm as they grow, typically dark brown to black, that clings to any wet surface with steady flow, which is exactly what an aerator screen or shower head is. This isn’t the same as elevated manganese alone causing staining. It specifically means bacteria are actively colonizing your plumbing, and that biofilm can slough off and clog fixtures over time.
Is It a Health Risk
Manganese and iron bacteria themselves aren’t typically classified as pathogenic, but their presence means your system has the right conditions (moisture, organic nutrients, low disinfection) for bacterial growth generally, and a well with this problem should get a full coliform and bacteria panel done, not just address the slime cosmetically. Treat the underlying cause, not just the visible symptom.
Cleaning It Off Fixtures (The Immediate Fix)
- Remove the faucet aerator or showerhead and soak it in a mixture of one part household bleach to ten parts water for 15 to 20 minutes.
- Scrub with an old toothbrush to break up any remaining biofilm in the mesh screen.
- Rinse thoroughly and reinstall.
- Repeat this every few weeks if the underlying cause hasn’t been addressed yet, since it will keep coming back.
Fixing the Actual Cause
Cleaning fixtures treats the symptom. To stop it from coming back, you need to address the bacteria colonizing your system, not just wipe down the aerator every month. Shock chlorination of the entire well and plumbing system is the standard first step, followed by either continuous low-level chlorination or UV disinfection to prevent recolonization. A manganese or iron filter installed afterward removes the food source the bacteria feed on, which makes it much harder for the problem to return.
| Step | Purpose | Cost |
|---|---|---|
| Shock chlorination | Kills existing bacteria colonization | $50 to $150 in materials, or $300 to $600 professionally done |
| UV disinfection system | Prevents bacteria from recolonizing going forward | $500 to $1,200 installed |
| Manganese or iron filter | Removes the mineral food source bacteria feed on | $1,500 to $3,200 installed |
When to Call a Pro vs. DIY
Cleaning individual fixtures is a fine DIY task, and shock chlorination is a reasonable weekend project if you follow the correct chlorine-to-water ratio for your well’s volume. Sizing a permanent manganese or iron filter, and setting up UV disinfection correctly, is worth a professional’s input, especially since getting the treatment order wrong (filter before addressing the bacteria, for example) means you’re just feeding new bacteria growth onto fresh media.
Get a full water test that includes iron, manganese, and bacteria before you do anything beyond cleaning the fixture. That test tells you whether you’re dealing with a mineral problem, a bacterial problem, or both together.