Nobody calls a well contractor because they’re curious. They call because the water turned orange, the ice cubes taste like a swimming pool, or a home inspector just flagged their system before closing. This guide lays out what those diagnostics show, not a sales pitch for a specific brand.
This article contains affiliate links. As an Amazon Associate we earn from qualifying purchases, at no extra cost to you. Read our full affiliate disclosure.
In this guide
- What a Well Water Filtration System Actually Does
- Start With a Water Test, Not a Shopping List
- The Core Components, and When You Actually Need Each One
- What a Complete System Actually Costs, Installed
- What Installation Day Actually Looks Like
- Maintenance You Cannot Skip
- Mistakes That Cost Homeowners Real Money
- DIY vs. Calling a Pro
- Do This Before You Buy Anything
- Frequently Asked Questions
What a Well Water Filtration System Actually Does
A “filtration system” on a well isn’t one box. It’s usually a lineup of two to five separate pieces of equipment, each solving a different problem your local aquifer creates. City water gets treated before it reaches your tap. Well water gets treated at your house, or it doesn’t get treated at all.
That distinction matters. Every well is different, even two houses apart on the same road. Field records show neighboring properties where one needed heavy iron treatment and the other needed almost nothing but a sediment filter. Guessing wastes money. Testing tells you the truth.
Start With a Water Test, Not a Shopping List
Before anyone sizes equipment for your house, you need a real lab test, not the free five-minute strip test a filtration salesman runs on your kitchen counter. Pull a sample and get it checked for iron, manganese, hardness, pH, sulfur (hydrogen sulfide), tannins, sediment load, and coliform bacteria at minimum.
Skip this step and you’ll end up buying a softener when what you actually needed was an iron filter, or installing a carbon filter that clogs in six weeks because nobody caught the sediment problem first. A separate walkthrough on testing your well water covers how to get this done correctly.
The Core Components, and When You Actually Need Each One
IN
Filter
Filter
Softener
Filter
System
TO HOUSE
Sediment Pre-Filter
Almost every well needs this, full stop. It’s your cheap insurance policy that protects every piece of equipment installed after it. Sand, silt, and rust particles will chew through a softener’s resin bed or a UV sleeve if they’re not caught first. A spin-down sediment filter or a standard cartridge housing runs $150 to $400 installed.
Iron and Manganese Filter
If your test shows iron above the EPA’s secondary standard of 0.3 mg/L, or manganese above its 0.05 mg/L guideline, you’ll see staining before you smell or taste anything. Orange on fixtures means iron. Black-brown streaks mean manganese. Oxidizing media filters (Filox, greensand, or air-injection systems) handle this. Expect $1,500 to $3,200 installed, depending on your flow rate and how much iron you’re actually dealing with.
Water Softener
Hardness above 7 grains per gallon means scale buildup in your water heater, clogged shower heads, and appliances dying years early. A properly sized ion-exchange softener runs $1,200 to $2,800 installed. Size it to your household’s actual water usage, not the smallest unit on the shelf. Undersizing for actual water usage is one of the most common mistakes in homeowner DIY installs.
Carbon Filter
Handles taste, odor, and some organic compounds. If your water has a musty or chemical taste but tests clean on the metals side, this is usually your fix. Whole-house carbon tanks run $600 to $1,500 installed.
UV Disinfection
Non-negotiable if your test comes back positive for coliform bacteria, and honestly worth doing preventively on any well. UV doesn’t change taste or clarity. It just kills what’s living in the water. Systems run $500 to $1,200 installed, plus a bulb replacement every 12 months for about $80 to $150.
Reverse Osmosis (Point of Use)
Under-sink RO gives you drinking-water-grade output at one or two taps without treating every gallon that flushes your toilet. Good option if your whole-house system handles hardness and iron but you still want extra polish on drinking water. Figure $250 to $700 installed for a single point. If you’d rather treat every tap in the house instead of just one, a whole-house RO setup is a bigger project with different math.
What a Complete System Actually Costs, Installed
Here’s how it breaks down in tiers, based on documented installation and quote data. These are equipment plus labor, not equipment alone.
| System Tier | What’s Included | Installed Cost |
|---|---|---|
| Basic | Sediment filter + UV | $650 – $1,600 |
| Mid-range | Sediment filter + softener + carbon | $2,500 – $5,000 |
| Full system | Sediment + iron filter + softener + carbon + UV | $5,500 – $9,500 |
| Full system + RO | Everything above, plus under-sink RO | $6,000 – $10,500 |
Anyone quoting a “whole house system” for $1,000 flat, sight unseen, is either lowballing to get in the door or leaving something out. Ask exactly what’s in the price before you sign anything.
What Installation Day Actually Looks Like
A full system install takes a crew one to two days. You’ll need a dedicated space (a basement, utility room, or conditioned garage) with a floor drain nearby for backwash and regeneration cycles. UV systems need a standard outlet. Iron filters and softeners need drain access within about 20 feet of the unit, or you’re paying extra for drain line runs.
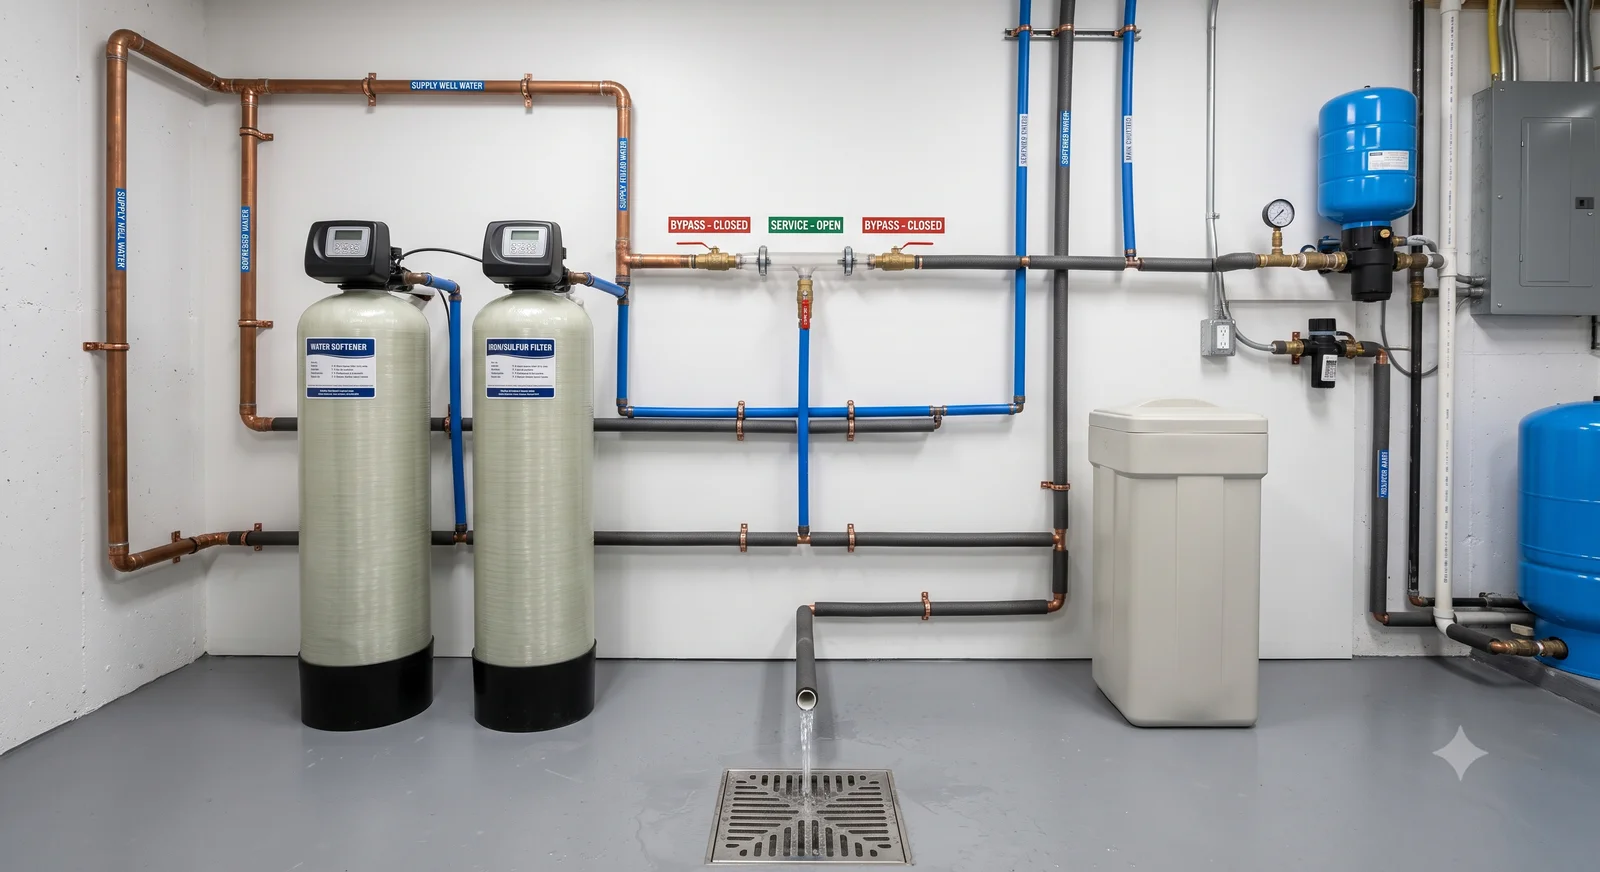
Most residential installs don’t need a permit, but some counties require one for anything tying into the main water line post-pressure-tank. Ask your installer directly. If they don’t know their local permit rules, that’s a red flag.
Maintenance You Cannot Skip
A filtration system with zero maintenance is worse than no system at all, because you’ll trust water that’s no longer being treated properly. Sediment filters need swapping every 3 to 6 months. Softener salt needs checking monthly. UV bulbs need annual replacement regardless of whether they “look fine.” A full maintenance schedule with month-by-month tasks covers the complete checklist for anyone who wants it.
Mistakes That Cost Homeowners Real Money
- Skipping the water test. Buying equipment based on a neighbor’s setup or a guess wastes thousands.
- Installing a softener before an iron filter. Iron fouls softener resin fast, cutting its lifespan from a normal 10 to 15 years down to roughly 5 to 7.
- Undersizing for flow rate. A system rated for 6 GPM in a house that runs two showers and a washing machine at once will choke, and you’ll blame the equipment instead of the sizing.
- Ignoring the drain requirement. Backwashing systems need somewhere for that water to go. Retrofitting a drain line after install costs more than planning for it up front.
DIY vs. Calling a Pro
A sediment filter housing or an under-sink RO unit is a reasonable weekend project if you’re comfortable with basic plumbing. A full iron filter, softener, and UV system tied into your pressure tank and drain line is a different animal. Get it wrong and you can siphon backwash water into your potable line, or undersize the bypass valve and lose water pressure to the whole house during regeneration.
The standard guidance: anything that touches the main line before the pressure tank, or requires a drain connection, calls for a licensed installer. Save DIY work for filter changes and salt refills.
Do This Before You Buy Anything
Pull a water sample this week if it’s been more than a year since your last test. Every cost estimate and every piece of equipment in this guide starts from those numbers, not a guess.